| Pytorch | 您所在的位置:网站首页 › pytorch 分割数据集 › Pytorch |
Pytorch
|
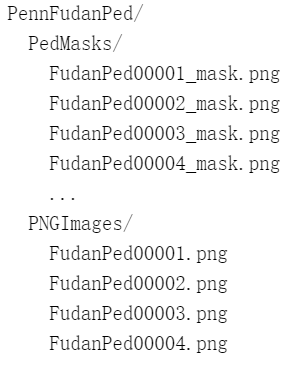
近来在学习图像分割的相关算法,准备试试看Mask R-CNN的效果。 关于Mask R-CNN的详细理论说明,可以参见原作论文https://arxiv.org/abs/1703.06870,网上也有大量解读的文章。本篇博客主要是参考了PyTorch官方给出的训练教程,将如何在自己的数据集上训练Mask R-CNN模型的过程记录下来,希望能为感兴趣的读者提供一些帮助。 PyTorch官方教程(Object Detection finetuning tutorial): https://github.com/pytorch/tutorials/blob/master/_static/torchvision_finetuning_instance_segmentation.ipynb 或: https://pytorch.org/tutorials/intermediate/torchvision_tutorial.html 需要注意的是,TorchVision需要0.3之后的版本才可以使用。 目录 准备工作 数据集 定义模型 训练模型 1. 准备工作 2. 数据增强/转换 3. 训练 测试模型 准备工作 安装coco的api,主要用到其中的IOU计算的库来评价模型的性能。 git clone https://github.com/cocodataset/cocoapi.git cd cocoapi/PythonAPI python setup.py build_ext installAPI的安装也可以参考另一篇: https://blog.csdn.net/u013685264/article/details/100331064 数据集本教程使用Penn-Fudan的行人检测和分割数据集来训练Mask R-CNN实例分割模型。Penn-Fudan数据集中有170张图像,包含345个行人的实例。图像中场景主要是校园和城市街景,每张图中至少有一个行人,具体的介绍和下载地址如下: https://www.cis.upenn.edu/~jshi/ped_html/ # 下载Penn-Fudan dataset wget https://www.cis.upenn.edu/~jshi/ped_html/PennFudanPed.zip # 解压到当前目录 unzip PennFudanPed.zip解压后的目录结构如下:
先看看Penn-Fudan数据集中的图像和mask: from PIL import Image Image.open('PennFudanPed/PNGImages/FudanPed00001.png') mask = Image.open('PennFudanPed/PedMasks/FudanPed00001_mask.png') mask.putpalette([ 0, 0, 0, # black background 255, 0, 0, # index 1 is red 255, 255, 0, # index 2 is yellow 255, 153, 0, # index 3 is orange ]) mask
每一张图像都有对应的mask标注,不同的颜色表示不同的实例。在训练模型之前,需要写好数据集的载入接口。 import os import torch import numpy as np import torch.utils.data from PIL import Image class PennFudanDataset(torch.utils.data.Dataset): def __init__(self, root, transforms=None): self.root = root self.transforms = transforms # load all image files, sorting them to ensure that they are aligned self.imgs = list(sorted(os.listdir(os.path.join(root, "PNGImages")))) self.masks = list(sorted(os.listdir(os.path.join(root, "PedMasks")))) def __getitem__(self, idx): # load images ad masks img_path = os.path.join(self.root, "PNGImages", self.imgs[idx]) mask_path = os.path.join(self.root, "PedMasks", self.masks[idx]) img = Image.open(img_path).convert("RGB") # note that we haven't converted the mask to RGB, # because each color corresponds to a different instance with 0 being background mask = Image.open(mask_path) mask = np.array(mask) # instances are encoded as different colors obj_ids = np.unique(mask) # first id is the background, so remove it obj_ids = obj_ids[1:] # split the color-encoded mask into a set of binary masks masks = mask == obj_ids[:, None, None] # get bounding box coordinates for each mask num_objs = len(obj_ids) boxes = [] for i in range(num_objs): pos = np.where(masks[i]) xmin = np.min(pos[1]) xmax = np.max(pos[1]) ymin = np.min(pos[0]) ymax = np.max(pos[0]) boxes.append([xmin, ymin, xmax, ymax]) boxes = torch.as_tensor(boxes, dtype=torch.float32) # there is only one class labels = torch.ones((num_objs,), dtype=torch.int64) masks = torch.as_tensor(masks, dtype=torch.uint8) image_id = torch.tensor([idx]) area = (boxes[:, 3] - boxes[:, 1]) * (boxes[:, 2] - boxes[:, 0]) # suppose all instances are not crowd iscrowd = torch.zeros((num_objs,), dtype=torch.int64) target = {} target["boxes"] = boxes target["labels"] = labels target["masks"] = masks target["image_id"] = image_id target["area"] = area target["iscrowd"] = iscrowd if self.transforms is not None: img, target = self.transforms(img, target) return img, target def __len__(self): return len(self.imgs)检查一下上面接口返回的dataset的内部结构 dataset = PennFudanDataset('PennFudanPed/') dataset[0]
可以看到,dataset返回了一个PIL.Image以及一个dictionary,包含boxes、labels和masks等域,这都是训练的时候网络需要用到的。 定义模型Mask R-CNN是基于Faster R-CNN改造而来的。Faster R-CNN用于预测图像中潜在的目标框和分类得分,而Mask R-CNN在此基础上加了一个额外的分支,用于预测每个实例的分割mask。 有两种方式来修改torchvision modelzoo中的模型,以达到预期的目的。第一种,采用预训练的模型,在修改网络最后一层后finetune。第二种,根据需要替换掉模型中的骨干网络,如将ResNet替换成MobileNet等。 1. Finetune预训练的模型 场景:利用COCO上预训练的模型,为指定类别的任务进行finetune。 import torchvision from torchvision.models.detection.faster_rcnn import FastRCNNPredictor # load a model pre-trained on COCO model = torchvision.models.detection.fasterrcnn_resnet50_fpn(pretrained=True) # replace the classifier with a new one, that has num_classes which is user-defined num_classes = 2 # 1 class (person) + background # get number of input features for the classifier in_features = model.roi_heads.box_predictor.cls_score.in_features # replace the pre-trained head with a new one model.roi_heads.box_predictor = FastRCNNPredictor(in_features, num_classes)2. 替换模型的骨干网络 场景:替换掉模型的骨干网络。举例来说,默认的骨干网络(ResNet-50)对于某些应用来说可能参数过多不易部署,可以考虑将其替换成更轻量的网络(如MobileNet)。 import torchvision from torchvision.models.detection import FasterRCNN from torchvision.models.detection.rpn import AnchorGenerator # load a pre-trained model for classification and return only the features backbone = torchvision.models.mobilenet_v2(pretrained=True).features # FasterRCNN needs to know the number of output channels in a backbone. # For mobilenet_v2, it's 1280. So we need to add it here backbone.out_channels = 1280 # let's make the RPN generate 5 x 3 anchors per spatial # location, with 5 different sizes and 3 different aspect # ratios. We have a Tuple[Tuple[int]] because each feature # map could potentially have different sizes and aspect ratios anchor_generator = AnchorGenerator(sizes=((32, 64, 128, 256, 512),), aspect_ratios=((0.5, 1.0, 2.0),)) # let's define what are the feature maps that we will use to perform the region of # interest cropping, as well as the size of the crop after rescaling. # if your backbone returns a Tensor, featmap_names is expected to # be [0]. More generally, the backbone should return an OrderedDict[Tensor], # and in featmap_names you can choose which feature maps to use. roi_pooler = torchvision.ops.MultiScaleRoIAlign(featmap_names=[0], output_size=7, sampling_ratio=2) # put the pieces together inside a FasterRCNN model model = FasterRCNN(backbone, num_classes=2, rpn_anchor_generator=anchor_generator, box_roi_pool=roi_pooler)3. 定义Mask R-CNN模型 言归正传,本文的目的是在PennFudan数据集上训练Mask R-CNN实例分割模型,即上述第一种情况。在torchvision.models.detection中有官方的网络定义和接口的文件,可以直接使用。 import torchvision from torchvision.models.detection.faster_rcnn import FastRCNNPredictor from torchvision.models.detection.mask_rcnn import MaskRCNNPredictor def get_instance_segmentation_model(num_classes): # load an instance segmentation model pre-trained on COCO model = torchvision.models.detection.maskrcnn_resnet50_fpn(pretrained=True) # get the number of input features for the classifier in_features = model.roi_heads.box_predictor.cls_score.in_features # replace the pre-trained head with a new one model.roi_heads.box_predictor = FastRCNNPredictor(in_features, num_classes) # now get the number of input features for the mask classifier in_features_mask = model.roi_heads.mask_predictor.conv5_mask.in_channels hidden_layer = 256 # and replace the mask predictor with a new one model.roi_heads.mask_predictor = MaskRCNNPredictor(in_features_mask, hidden_layer, num_classes) return model至此,模型就定义好了,接下来可以在PennFudan数据集进行训练和测试了。 训练模型 1. 准备工作在PyTorch官方的references/detection/中,有一些封装好的用于模型训练和测试的函数,其中references/detection/engine.py、references/detection/utils.py、references/detection/transforms.py是我们需要用到的。首先,将这些文件拷贝过来 # Download TorchVision repo to use some files from references/detection git clone https://github.com/pytorch/vision.git cd vision git checkout v0.4.0 cp references/detection/utils.py ../ cp references/detection/transforms.py ../ cp references/detection/coco_eval.py ../ cp references/detection/engine.py ../ cp references/detection/coco_utils.py ../ 2. 数据增强/转换在图像输入到网络前,需要对其进行旋转操作(数据增强)。这里需要注意的是,由于Mask R-CNN模型本身可以处理归一化及尺度变化的问题,因而无需在这里进行mean/std normalization或图像缩放的操作。 import utils import transforms as T from engine import train_one_epoch, evaluate def get_transform(train): transforms = [] # converts the image, a PIL image, into a PyTorch Tensor transforms.append(T.ToTensor()) if train: # during training, randomly flip the training images # and ground-truth for data augmentation transforms.append(T.RandomHorizontalFlip(0.5)) return T.Compose(transforms) 3. 训练至此,数据集、模型、数据增强的部分都已经写好。在模型初始化、优化器及学习率调整策略选定后,就可以开始训练了。这里,设置模型训练10个epochs,并且在每个epoch完成后在测试集上对模型的性能进行评价。 # use the PennFudan dataset and defined transformations dataset = PennFudanDataset('PennFudanPed', get_transform(train=True)) dataset_test = PennFudanDataset('PennFudanPed', get_transform(train=False)) # split the dataset in train and test set torch.manual_seed(1) indices = torch.randperm(len(dataset)).tolist() dataset = torch.utils.data.Subset(dataset, indices[:-50]) dataset_test = torch.utils.data.Subset(dataset_test, indices[-50:]) # define training and validation data loaders data_loader = torch.utils.data.DataLoader( dataset, batch_size=2, shuffle=True, num_workers=4, collate_fn=utils.collate_fn) data_loader_test = torch.utils.data.DataLoader( dataset_test, batch_size=1, shuffle=False, num_workers=4, collate_fn=utils.collate_fn) device = torch.device('cuda') if torch.cuda.is_available() else torch.device('cpu') # the dataset has two classes only - background and person num_classes = 2 # get the model using the helper function model = get_instance_segmentation_model(num_classes) # move model to the right device model.to(device) # construct an optimizer params = [p for p in model.parameters() if p.requires_grad] optimizer = torch.optim.SGD(params, lr=0.005, momentum=0.9, weight_decay=0.0005) # the learning rate scheduler decreases the learning rate by 10x every 3 epochs lr_scheduler = torch.optim.lr_scheduler.StepLR(optimizer, step_size=3, gamma=0.1) # training num_epochs = 10 for epoch in range(num_epochs): # train for one epoch, printing every 10 iterations train_one_epoch(model, optimizer, data_loader, device, epoch, print_freq=10) # update the learning rate lr_scheduler.step() # evaluate on the test dataset evaluate(model, data_loader_test, device=device) 测试模型现在,模型已经训练好了,来检查一下模型在测试图像上预测的结果。 # pick one image from the test set img, _ = dataset_test[0] # put the model in evaluation mode model.eval() with torch.no_grad(): prediction = model([img.to(device)])这里输出的prediction中,包含了在图像中预测出的boxes、labels、masks和scores等信息。
接下来,将测试图像及对应的预测结果可视化出来,看看效果如何。 Image.fromarray(img.mul(255).permute(1, 2, 0).byte().numpy()) Image.fromarray(prediction[0]['masks'][0, 0].mul(255).byte().cpu().numpy())
可以看到,分割的结果还是不错的。到此,训练自己的Mask R-CNN模型就完成了。
Bug解决 在测试模型性能的时候,如果出现ValueError: Does not understand character buffer dtype format string ('?'): File "build/bdist.linux-x86_64/egg/pycocotools/mask.py", line 82, in encode File "pycocotools/_mask.pyx", line 137, in pycocotools._mask.encode ValueError: Does not understand character buffer dtype format string ('?')通过修改coco_eval.py中mask_util.encode一行,添加dtype=np.uint8,即可搞定。 In coco_eval.py: rles = [ mask_util.encode(np.array(mask[0, :, :, np.newaxis], dtype=np.uint8, order="F"))[0] for mask in masks ]
|


【本文地址】